Opening the Tada Shopify App
To get started, you'll want to login to your Shopify Store Dashboard. To do this, you'll want to visit:
https://(your shop url.com)/admin/
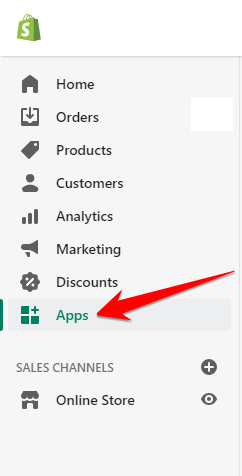
Once logged in, you should see a menu on the left hand side of your screen, you'll want to select Apps
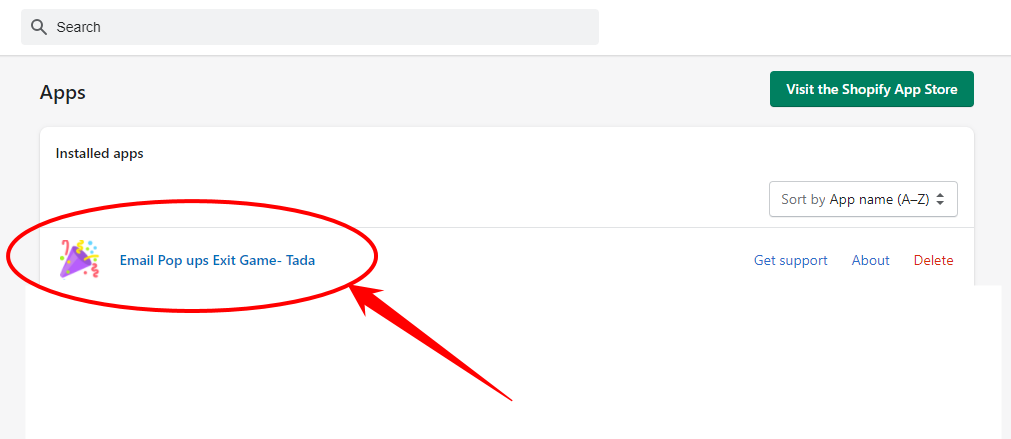
From the page that comes up, you'll want to select your Tada Shopify App
Creating your new Widget
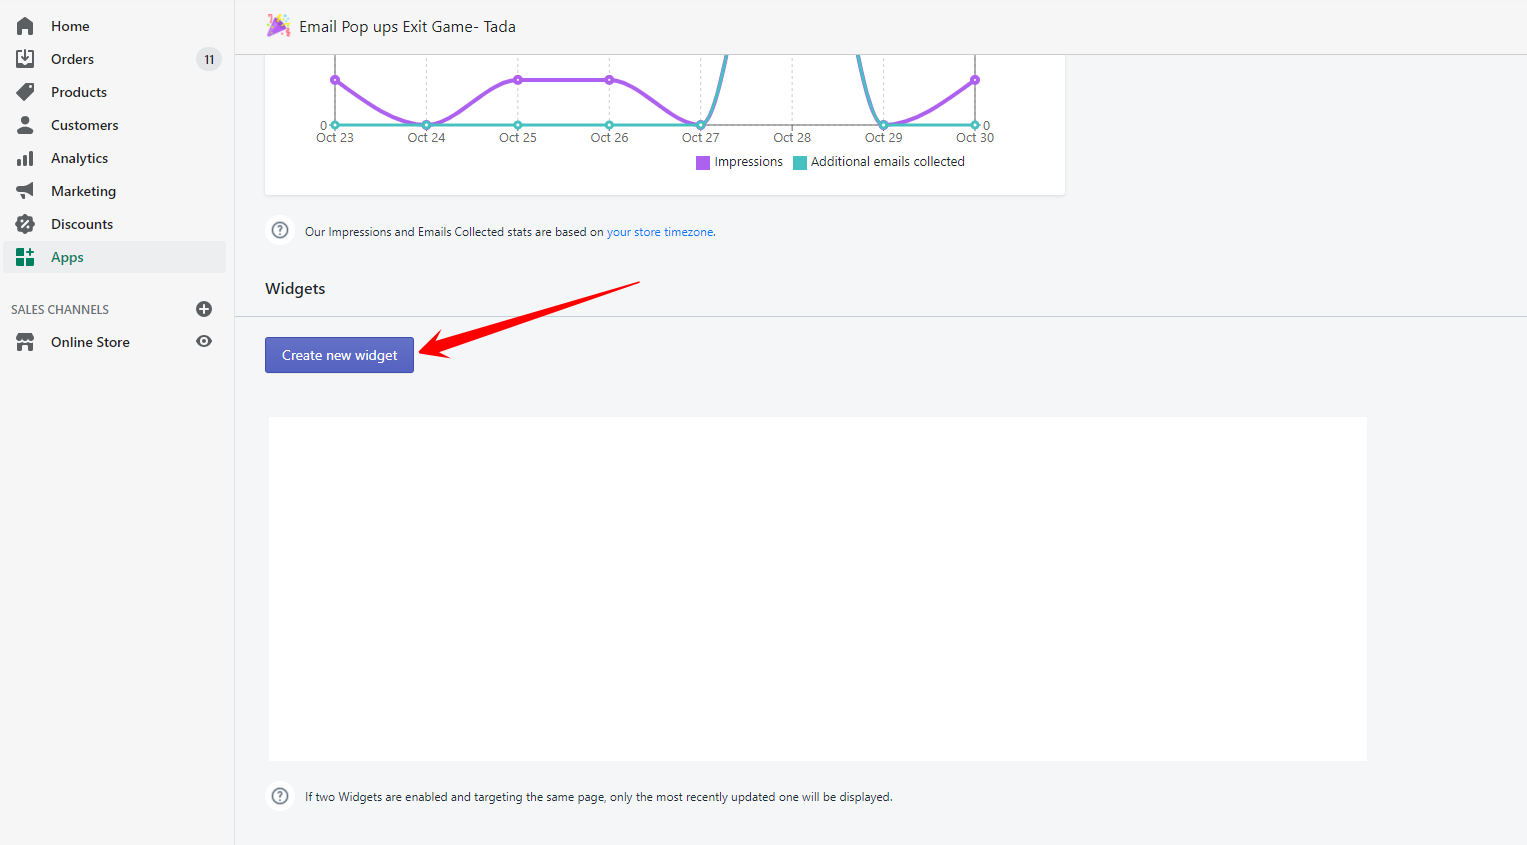
You'll land on your Tada Dashboard. From there you can scroll down until you see the Create new widget button and click it.
Name & Type
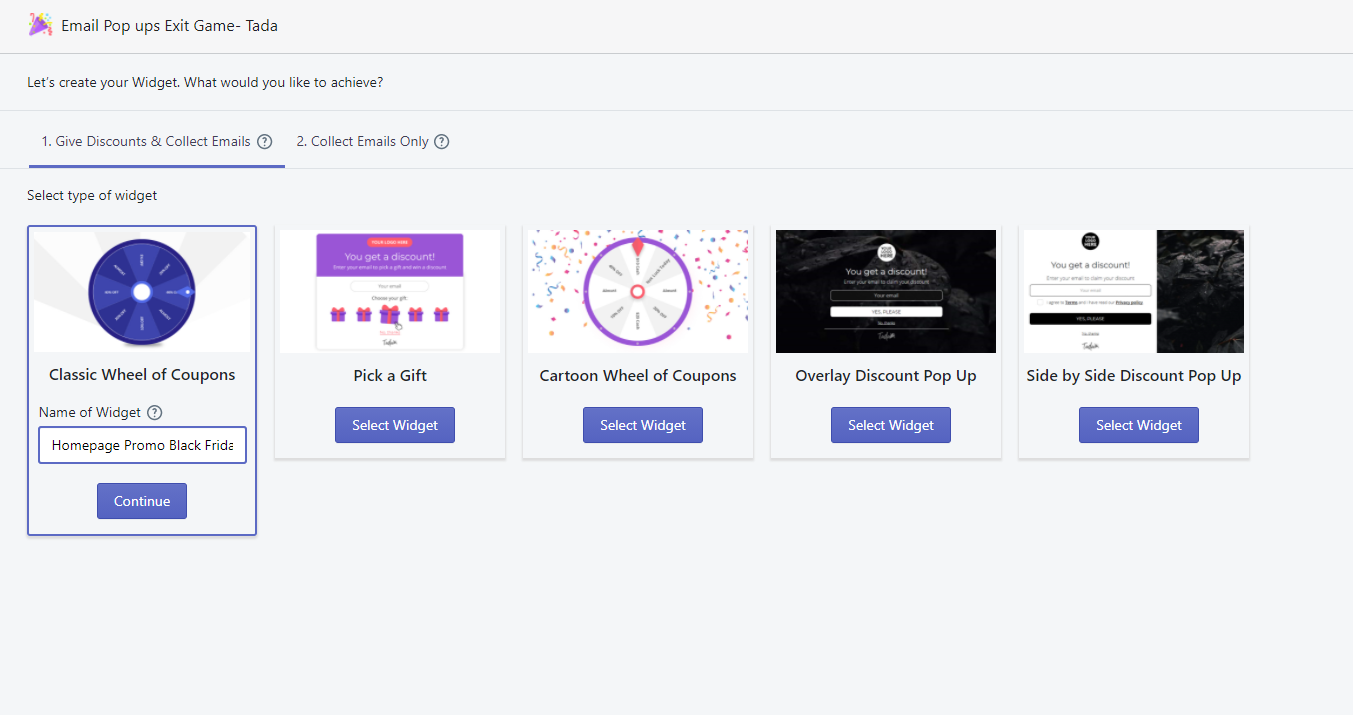
You should determine first whether you'd like to give discounts & collect emails or collect emails only. If you choose the former, you can opt for games available on Tada. These are: Classic Wheel of Coupons, Pick a Gift, Carton Wheel of Coupons, Overlay Discount Pop Up, and Side by Side Discount Pop Up.
If you want to collect emails only, you can only select either an Overlay Pop Up or a Side by Side Pop Up. Make your choice using the Select Widget button then you'll be able to name your widget, for example, this could be Homepage Promo Black Friday. You'll be able to customize them on the next step after clicking Continue.
1. Coupon
Next, you'll want to decide what kind of discount you want to offer your visitors.
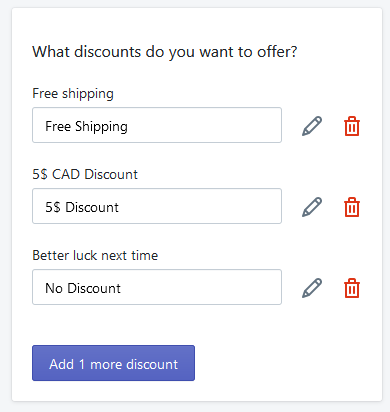
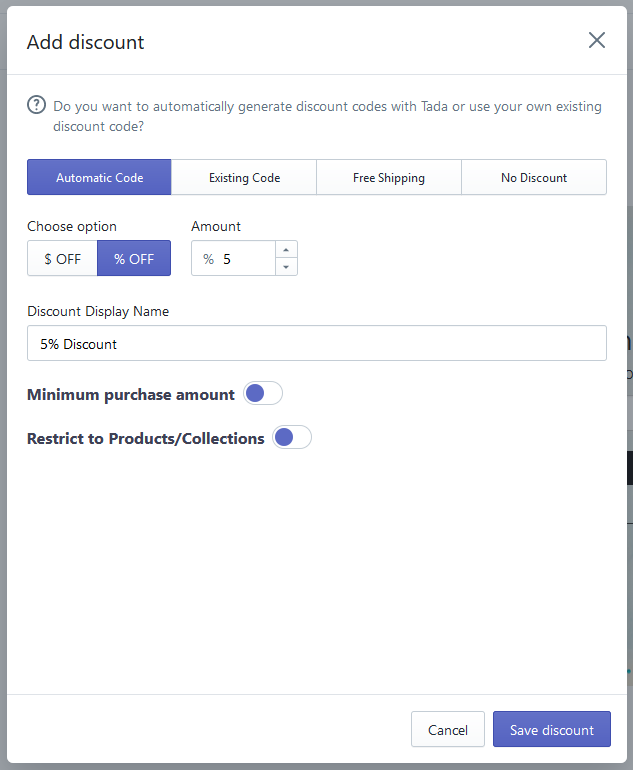
You can select from four options available: Automatic Code, Existing Code, Free Shipping, or No Discount.
Automatic Code will let Tada take care of creating Discounts on your behalf as your users get them. This is the simplest way to use Tada (Recommended).
Existing Code will let you enter your own discount code. Those discount codes would need to be created in the Shopify Discount section first before being added to Tada. This option gives you the most flexibility around discount requirements.
Free Shipping is an automatically generated code that gives your user Free Shipping on their order.
No Discount is a place holder that means that the user does not get a discount. If you want to create a game of luck where not everyone wins a discount, you should add the No Discount option and set a change percentage to it in the Coupon Chances section. We do not recommend using the No Discount option, as this isn't a good user experience to "not win anything"
You can also customize the Coupon chances (the drop rate of each discount) by clicking the View & Edit link. Using this feature, you could, for example, make one discount drop only 1% of the time while increasing the likelihood receiving the Free Shipping discount.
Please note that the total sum of the Coupon Chances should always be 100. That percentage are the changes of a visitor landing on that specific discount.
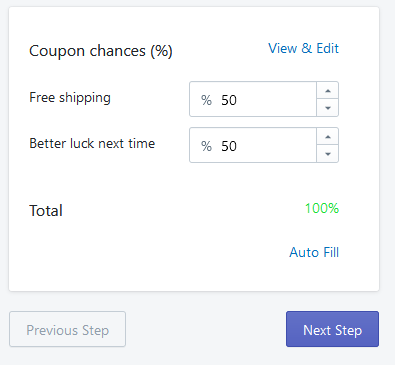
We'll click Next Step once we're happy with our discounts.
2. Style
In this next section, we get to choose the color scheme of our Widget to make sure it will look good on our site. We also have some neutral color themes (Clear & Dark themes) that will work with most websites.
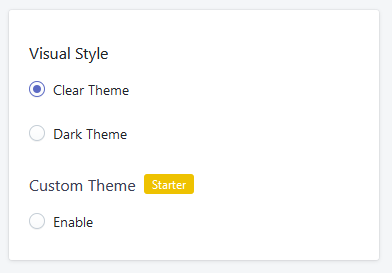
If you are subscribed to our Premium Plan, you can select a custom theme (you can input your custom color codes) that enables you to select your color that you want. You can also choose to change the Pop Up Size and to Remove Tada Branding.
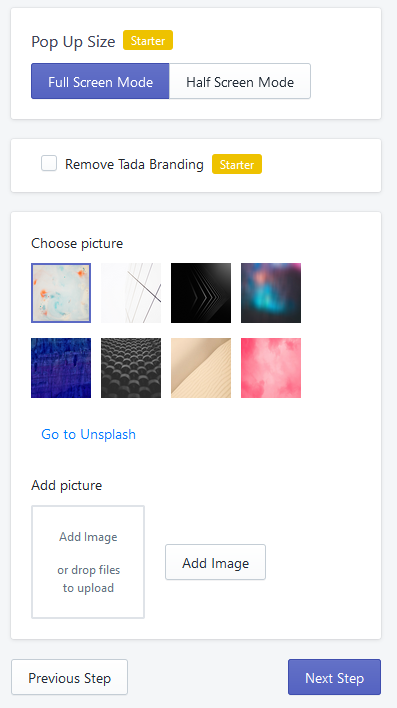
Our Business Plan includes an option to add a Scarcity Progress Bar.
Click Next Step once you're done with the style of the Widget.
3. Widget
In this section, you can select how your widget will work on your website.
In the Real-time Email Validation section, you can make your widget detect whether an email entered is a valid email or not. In case the email is not considered valid, the “email address” bar will highlight in red and suggest the email address used is not valid. Note that this is not required for using Tada but is Recommended.
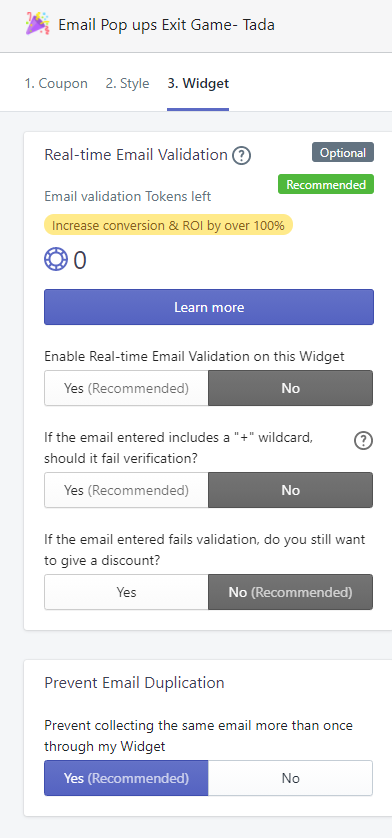
In the Prevent Email Duplication section, you can turn this on so customers will not put the same email twice.
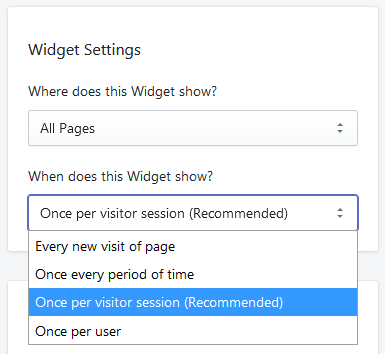
In the Widget Settings, you can select which pages of your site your Widget will show to your visitors and how often. We recommend using Once per visitor session to make it unique.
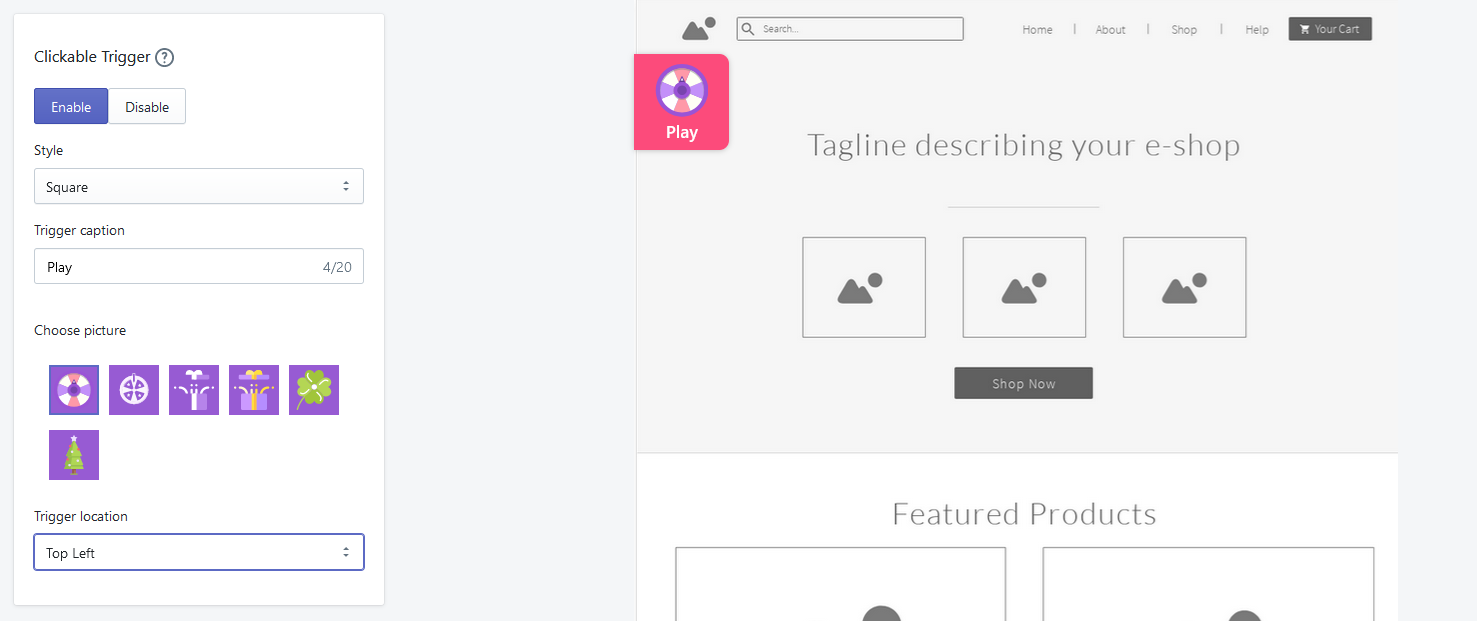
Clickable Trigger allow your visitors to re-trigger your Widget after they closed it or on a later visit. If enabled, it will always show once the Widget is closed but hasn't been played. You can select from three different styles: Square, Circle, or Tab. And you can further customize the display picture and location on your website!
In the "Where does my Widget show?" dropdown, you can select where you'd like your Widget to be seen. Learn more about this with our How can I pick where to show my Tada Widget? article.
In the "When does this Widget show?" dropdown, you can select one of the following:
- Once per visitor session: Our recommend setting ✅. This option will show your Widget once per Browser visitor session. This means that your visitors will only see your Widget once when visit your site, per time they open their browser.
- Every new visit of page: your Widget will show every time a visitor goes to a new page until played or closed.
- Once per user: your Widget will show once to each visitor.
- Once every period of time: your Widget will show immediately to each user, and then wait the specified period of time until getting showed again until played or closed.
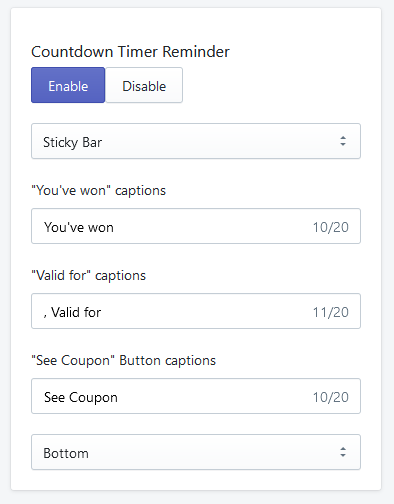
In the Countdown Timer Reminder section, you can decide on a reminder style your visitors can see. You can opt for a Sticky Bar type reminder or Bubble type. You can also change the captions.
We have two options available which are:
Sticky Bar (in line with the Widget colors selected)

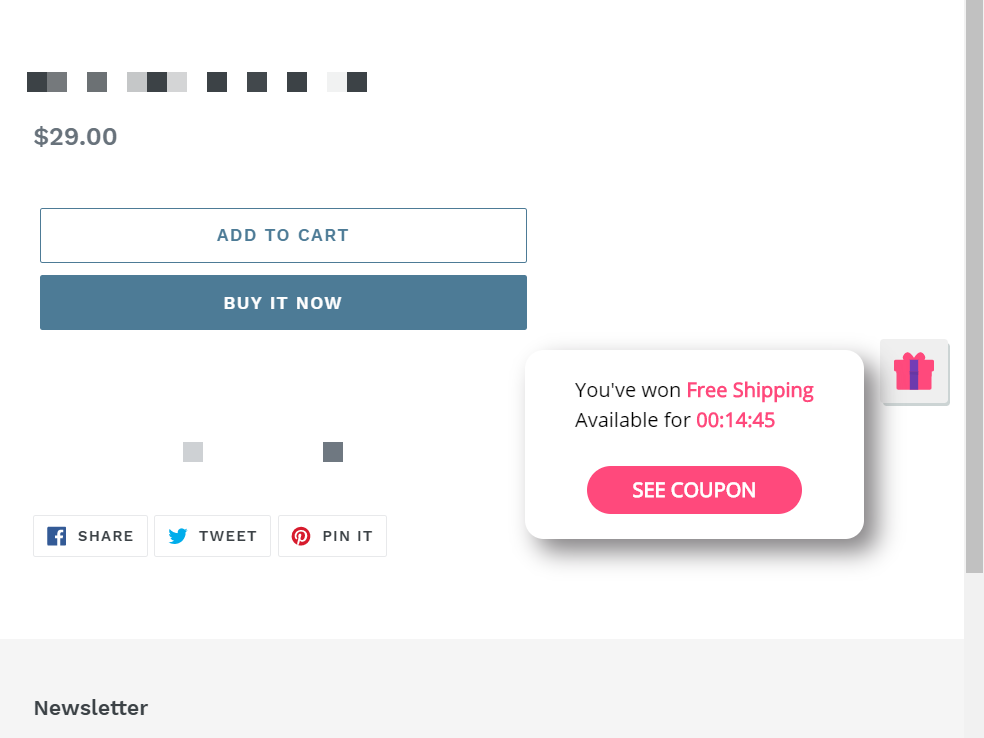
Bubble Reminder (using the same colors as the Widget style selected) The text with the countdown appears when clicking the gift icon. Middle right placement in this example.
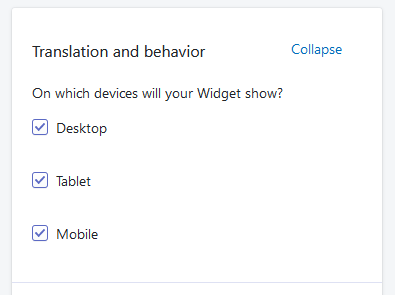
You can also select which devices your widget will show in the Translation and behavior section.
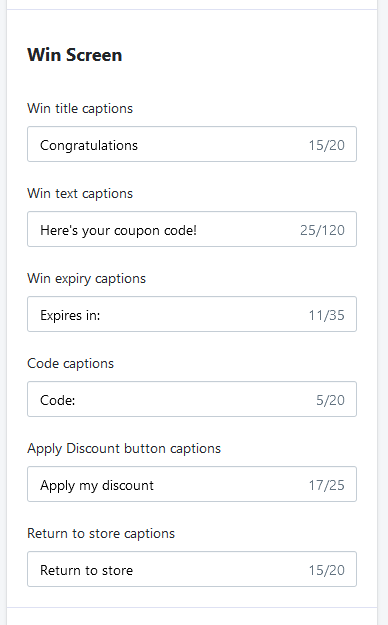
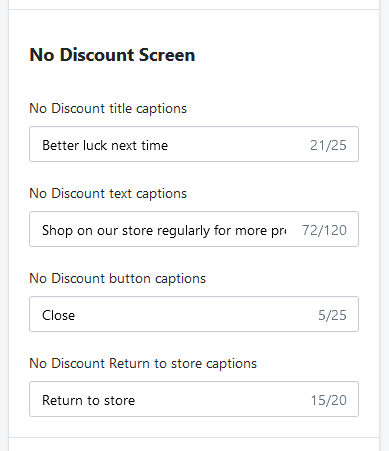
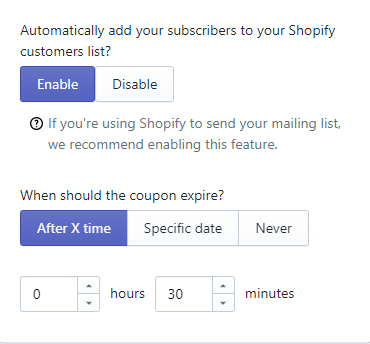
You may also want to edit the Win Screen and No Discount Screen on your Widget such as its captions or the time before the coupon expires. You can also enable to add the emails to your Shopify mailing list.
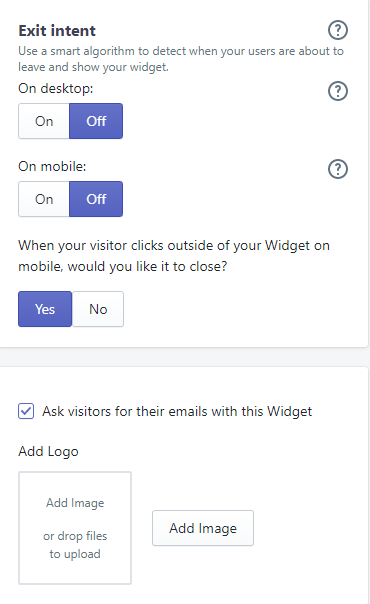
Lastly, you can use a smart algorithm to detect when your users are about to leave and show your widget. You can enable this on the Exit intent section of your Widget settings. Note that Exit intent will only show the widget if it hasn't showed previously using any other triggers. We will not show the same Widget twice in the same page view.
Once you're all set with your settings, make sure to preview all your widgets: the Invite screen, Win screen, No Discount, and Reminder screen.
If you'd like to save your current progress without setting your Widget live, hit the Save & Pause Widget option in the top right.
You can also use the Save & Test option to give a try to your Widget. If you like the way it looks, hit the Save & Publish options in the top right of the widget editor to set it live 🚀.
Congratulations, you're all done creating your first Tada Widget!
